How to Set Up WiFi Printing with a Brother HL-2270DW Laser Printer and Your Apple Airport Express
Tags:
Bottom Line: A painless, wireless, CD-free way to set up WiFi printing with a Brother HL-2270DW laser printer and your Apple Airport Express.
I got rid of my inkjet printer… probably two years ago, and I haven’t looked back. The very rare times I need to print something, I make a run to the local library. The minor inconvenience of not being able to print has pushed me to more actively try to fill out paperwork digitally, find all-electronic was to sign and fax paperwork, and “actively encourage” places I patronize to accept digital coupons from my iPhone. (By “actively encourage,” I mean make a formal complaint to a manager when they insist on a printed offer, which I consider ridiculous.)
However, my fiancée (note the gender specific spelling, vs fiancé — shout out to Symentist for that one) and I decided today that a small, inexpensive, black-and-white laser printer may be worth the expense.
After some brief research and a quick Slickdeals coupon search, we settled on the Brother HL-2270DW. It goes for $80-$100 (and we got a 15% off coupon), it’s small, fast, reliable, prints thousands of sheets per ink refill, and has won awards for being the best cheap laser printer years in a row.
When I say years in a row, that should clue you in as to its most frequently identified shortcoming: while it is capable of wireless printing, it is a little older, and getting it set up for wireless printing (especially on a Mac) has been “an issue” for some people.
Like a few of my readers, I don’t always read the instruction manual… so I thought I’d give a “short version” on how I got my printer set up, without using any extra cables, and without using the CD (since I don’t have a CD / DVD drive anymore).
Here it is:
- Open the box for your new printer and take off all the stickers. Including the one with some funny instructions about gently shaking the print cartridge side to side.
- Plug in the power cord, somewhere relatively close to your router.
- Hit the power switch on the right side.
- Wait for it to finish booting completely (no more blinking lights or sounds).
- Use a pen to hold down the hidden button on the back (pic below) for 3 or 4 seconds to activate the “WPS” setup.
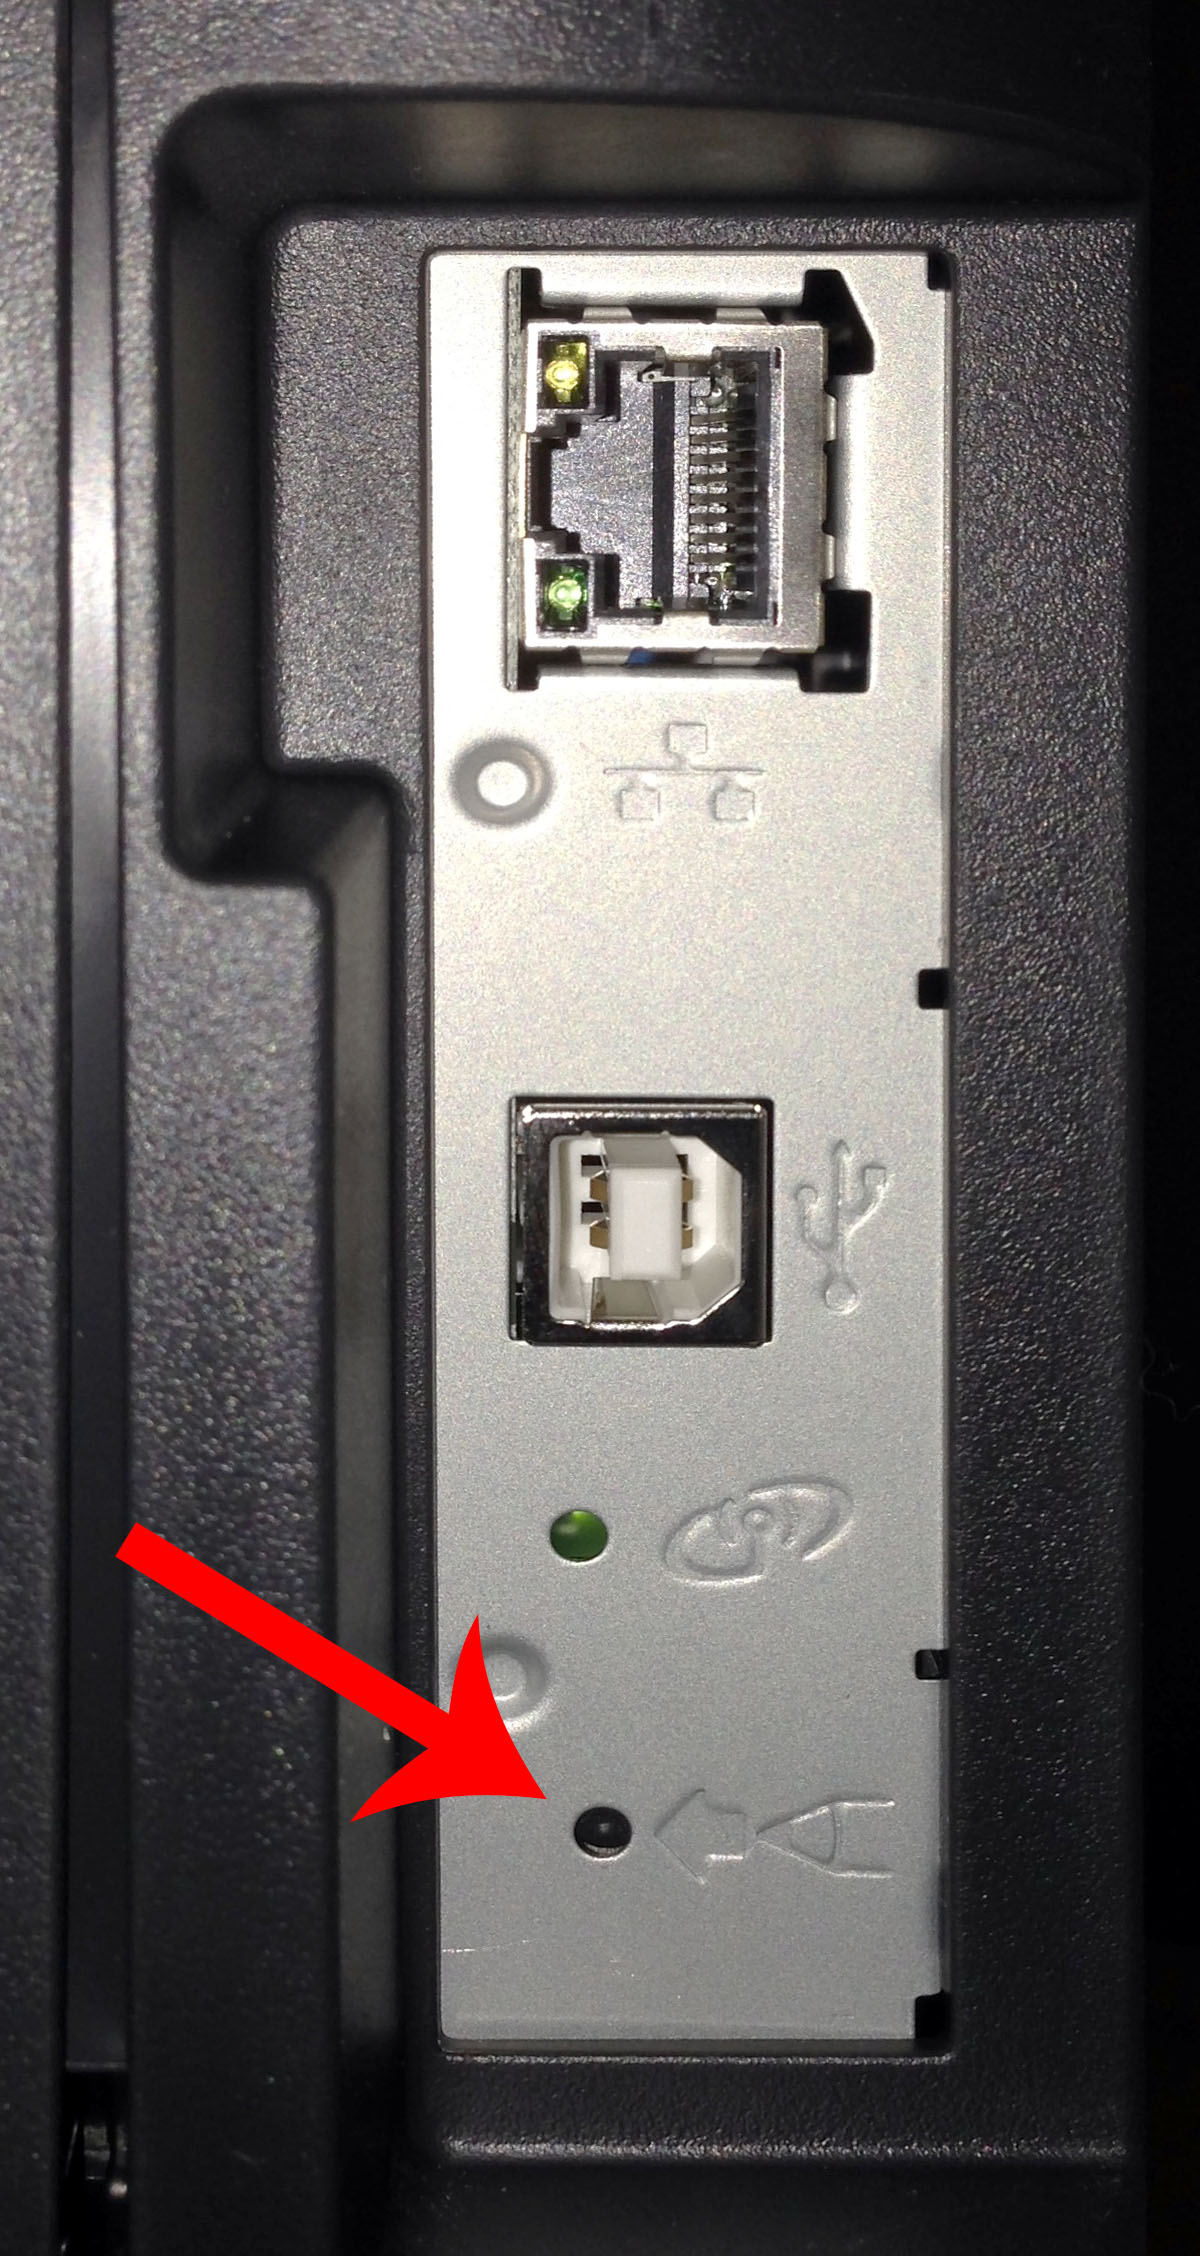
- It should print a sheet of paper — get the PIN.
- Open Airport Utility on your Mac (should be pre-installed 10.9 or later, but you can also download it here), or it looks like even the iOS version would work.
- On OSX:
Base Station->Add WPS Printer...->PIN - On iOS:
Edit->Advanced->Add WPS Printer->With PIN - Then wait a while and it should eventually paired. Mine took approximately 60 seconds, from a distance of 1.5 meters.
- On your Mac, open
System Preferences->Printers & Scanners, and hit the little+button in the bottom left side. - You should (hopefully) see the Brother printer in the list of printers to add. Give it a name, hit
Add, and you’re all set!
Hope this helps a few of you get set up a little more easily than you would have otherwise! And no, unfortunately I don’t think it works with AirPrint for iOS (if I’m wrong, let me know in the comments section below).